You can manually add reviews to a provider's record outside of KidKare, or the Admin Review site. This is especially useful if you do all review work manually.
- Click the Providers menu and select Provider Reviews. The List Reviews window opens.
- In the Filter By section, select All Providers or Selected Providers. If you choose Selected Providers, click the Provider drop-down menu and select the provider.
- Click Refresh List.
- To add a review:
- If you filtered to All Providers in Step 2, click Add next to the provider for whom to add a review. The Add New Review window opens.
- If you filtered to a specific provider in Step 2, click Add Review in the bottom-left corner of the window. The Add New Review window opens.
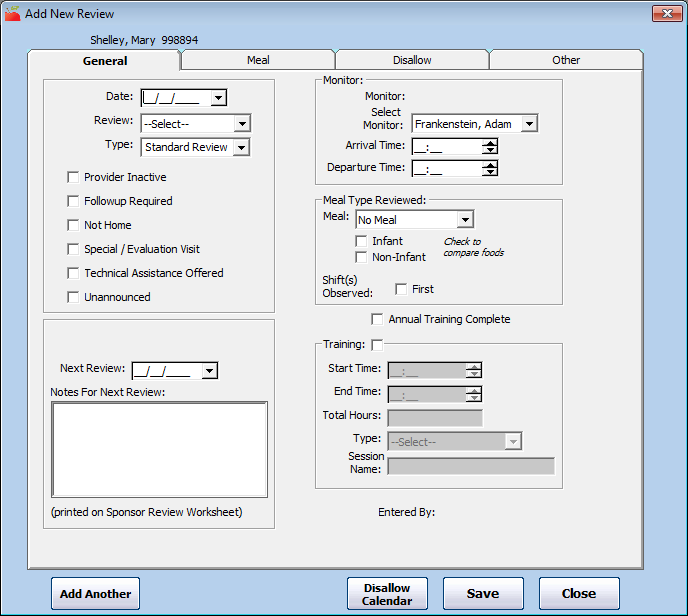
- In the General Tab:
- Click the Date box and enter the date of the review.
- Click the Review drop-down menu and select the classification of this review. This impacts the date set in the Next Review box. You can choose from the following:
- 1st - 4th Review
- Follow-up Review
- Pre-approval Review
- 28 Day/30 Day/ 4 Week Review
- Special/Eval
Note: If you select Special/Eval, the next review due date is not set, and this review does not affect the provider's review schedule.
- Click the Type drop-down menu and select the type of the review. Some review types can be automatically set by other fields in the software. For example, weekend reviews are determined by the review date.
- Check the box next to any of the following options that apply:
- Provider Inactive
- Followup Required
- Not Home
- Special/Evaluation Visit
- Technical Assistance Offered
- Unannounced
- Click the Notes for Next Review box and enter any notes for the next review. The information entered in this box prints on the Sponsor Review Worksheet in the Review History section.
Note: Even though the Next Review Date box defaults to a certain value based on the review type, you can change it, if needed.
- In the Monitor section, select the Monitor, their arrival time, and their departure time.
- In the Meal Type Reviewed section, select the meal type and age groups reviewed. Your selection here affects the available options in the Meal tab. Note that if you select No Meal, the Meal tab is not available.
- Check the Annual Training Complete box if the Monitor recorded an annual training with the provider during this review. If you check this box, the system assumes that training occurred and you can supply any other relevant training information.
- Check the Training box if any other training was completed with this provider. Then, enter the training details: Start/End Time, Total Hours, Type, and Session Name.
- Click the Meal tab and enter the information below. If you selected No Meal in Step 5g, go to Step 7.
- Check the box next to each child in attendance for the meal. If this provider is set up for multiple servings, and you indicated that the Monitor observed both servings in the General tab, check the box next to the serving at which the child was present.
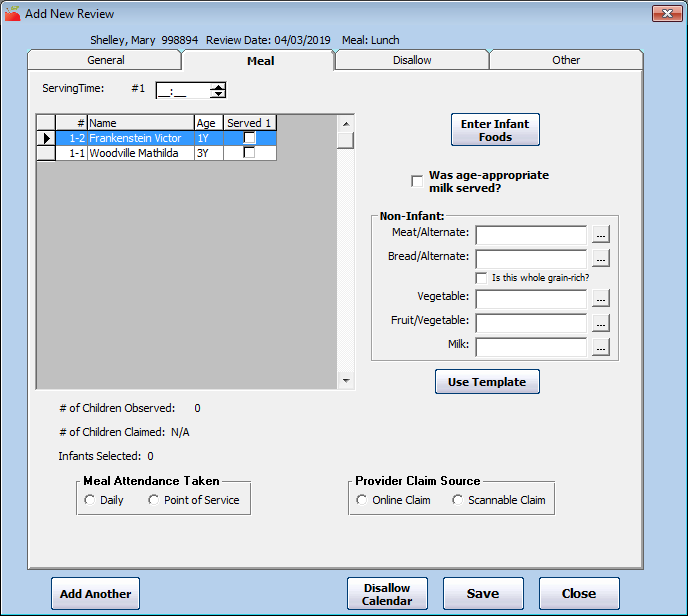
- Enter the foods served. Click Enter Infant Foods to enter any infant foods, if needed. You can leave meal information blank, but if you do supply foods/attendance, the system cross-checks this information when the claim is processed. Any discrepancy between what you note here and what the provider has claimed causes an error when the claim is processed.
- Check the box next to each child in attendance for the meal. If this provider is set up for multiple servings, and you indicated that the Monitor observed both servings in the General tab, check the box next to the serving at which the child was present.
- Click the Disallow tab. Use this tab to disallow meals based on information observed during the review. Only use this tab if the Monitor noticed a situation during the review that required a certain meal or set of meals to be disallowed.
- Click the Disallow Infant Meals or the Disallow Non-Infant Meals box to disallow meals for a specific age group. Checking neither box has the same effect as checking both boxes when you specify a date and meal range.
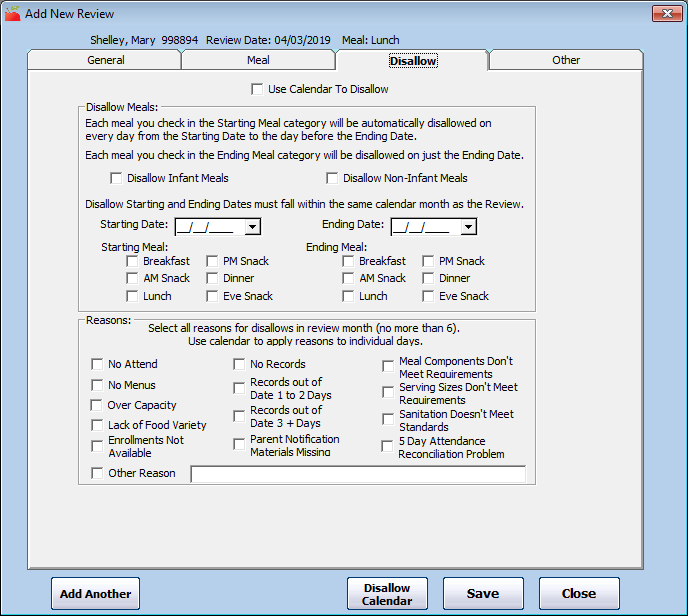
- Click the Disallow Starting Date and Ending Date boxes and enter the first date and last date to be disallowed. To disallow meals for one day only, enter the same date in these boxes.
- In the Starting Meal section, check the box next to each meal to disallow from the starting date through (but not including) the ending date.
- In the Ending Meal section, check the box next to each meal to disallow on the ending date.
- In the Reasons section, check the box next to each reason to apply to the disallowances.
Note: You can also disallow meals with the Disallow Calendar. To do so, check the Use Calendar to Disallow box and then click Disallow Calendar. For more information see, Disallow Meals with the Disallow Calendar. You must select reasons and save your progress before opening the calendar.
- Click the Disallow Infant Meals or the Disallow Non-Infant Meals box to disallow meals for a specific age group. Checking neither box has the same effect as checking both boxes when you specify a date and meal range.
- Click the Other tab. Use this tab to record additional information about the review. None of the information in this tab is required, and it is not checked when processing claims. You can reference this information in certain reports.
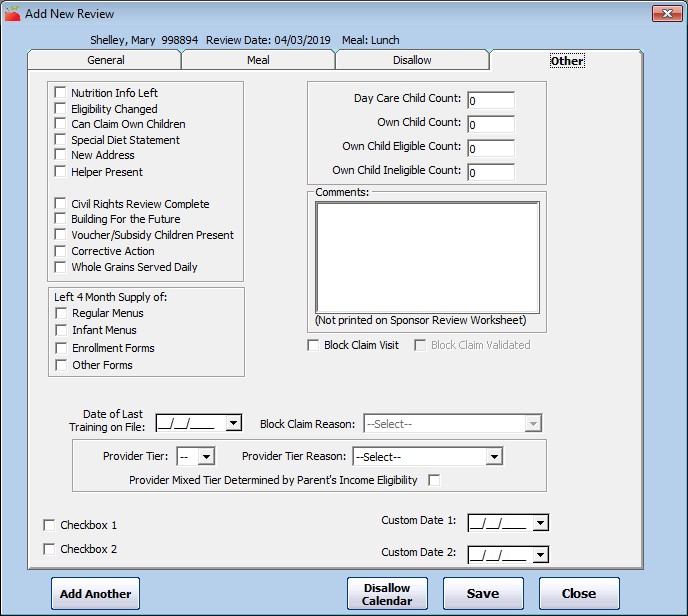
- When finished, click Save.
- Click OK at the confirmation prompt. At this point, you can click Add Another to add another review, or click Close to close the window.


